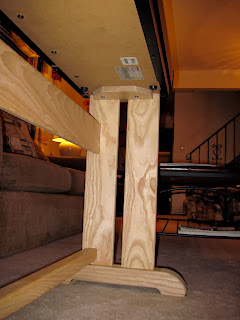
I began shaping the feet using the bandsaw I materialized earlier. It had no problem cutting 2.25" ash.
I cleaned the cuts with the spindle sander and routed the edges to 1/4" round.
I cut material away from the vertical supports for the upper mounting piece or whatever. I also routed the edges of these supports.
Test fit everything together. The mortises for the cross beams needed filed at this point.
I glued and clamped the vertical supports into their mortises. The clamps provided just enough pressure to hold the supports in place.
SAME.
Here you can see the upper mounting pieces installed. No glue for this. I only used 4 countersunk wood screws to hold everything solid.
Another test fit. The vertical supports that extended below into the feet were trimmed flush with the feet.
The horizontal cross beams neat mounted to the vertical parts, so T-nuts were recessed into them to provide a nut for a bolt to anchor. This required a series of holes to be drilled to allow the nut to seat flush and strongly into the beams.
This wide piece has 4 t-nuts (2 per side) while the lower, thinner piece has only 2 t-nuts (1 per side). Holes were drilled into the vertical supports to allow the beams to bolt to the verticals.
With a few holes drilled in the mounting brackets, the piano was attached. With everything tightened, there is almost no wobbling of the piano. It's much more sturdy than I would have predicted.
M5 bolts hold the piano down.
I still need to trim the ends of the cross beams.
Wonderful.
My next step is to find a good mix of stains to match the fake wood on the piano. I will stain the stand and finish it with minwax polycrylic. I am also planning a matching piano bench.
More to come.


No comments:
Post a Comment