Naphtha for surface prep. Klean-Strip Lacquer Thinner for lacquer clean up, and Behlen Qualalacq Lacquer Reducer (Lacquer Thinner) for actual thinning. Vinyl Sealer for sealing and adhesion purposes on the epoxy filler. Behlen's Stringer Instrument Lacquer for its obvious use.
I'm still using the purple Harbor Freight HVLP Gun #66222.
About $70 in finishing solvents and lacquers. It's good practice to use a good lacquer thinner for thinning. I believe the cheaper thinners have more moisture/solids in them which can blemish the finish. However, I've heard plenty of people having success with cheap thinners. I recommend doing some research, but I'd say use good thinners, and you won't have a problem.
Same garage booth. Temp and humidity are perfect. Shown above is about the lowest both have gotten over 4 days. They have gone up to about a max 48% and 70F. With the small microwave fan blowing out the garage door window, warm and dry air is pulled from the air conditioned house. Two floor heaters brought the temp up a few degrees.
Da' Boof. Every consecutive booth I've built loses craftsmanship. This 3rd one is incredibly half-assed. Two 9'x12' 3 mil tarps taped and clamped to the ceiling. No poplar braces. Nothing. It'll do.
After coat 7. (orange peel looks much less pronounced in person)
I didn't document much on the actual spraying. It was a lot of fiddling with air flow, air pressure, fan shape, and fluid control knobs on the HVLP gun.
The first 3 coats were awful. Incredible orange peel. I didn't lay on enough material and the air pressure and CFM was shit because I accidentally choked the supply air by leaving the pressure regulator down low at the compressor.
The next 3 went on nicely, but the orange peel from the previous coats still showed through. I had added about 10% thinner. After 48 hours curing, I level sanded the finish (3-4 hours of straight sanding) with 400 grit dry.
The last 2 coats were thinned 50/50. I applied it as thick as I could. The results were amazing. The final result was a rather respectable smooth finish, especially when the value of the tools used is considered.
Wonderful. The wet sand/buff work will be quick and painless.
I didn't level enough on the headstock, and some bigger orange peel has shown through. Not a problem.
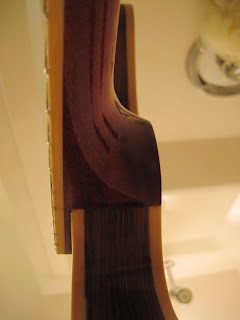
The wood grain depth and holographics are much more pronounced with this epoxy, sealer, lacquer finish than in previous attempts. The mahogany neck looks fantastic.
After coat 7. Some sanding marks shown through. It disappeared after the final coat 8. The leveling and flow-out of the lacquer is quite satisfactory.
After coat 8, hanging in an unused shower. The fretboard tape was carefully removed 24 hours after the last coat. The f-hole paper towels were carefully pulled out. Thumbs up.
It's hard to capture the texture.
I almost don't need to buff it.
This mahogany is beautiful. On a side note, I've determined the type of mahogany that I used. I realized through working the wood that it had a differing figure and smell compared to 'regular' mahogany (honduran, etc.). It smelled like flowers or old lady perfume when tooled. Some folks on a woodworking subsection on Reddit linked to a wood database and I found the only type of mahogany that smells. http://www.wood-database.com/lumber-identification/hardwoods/santos-mahogany/
Now to wait 1-3 months to wet sand and buph.
-Andrew


