Tuesday, May 28, 2013

Bandsaw: Update 11

 Eh.
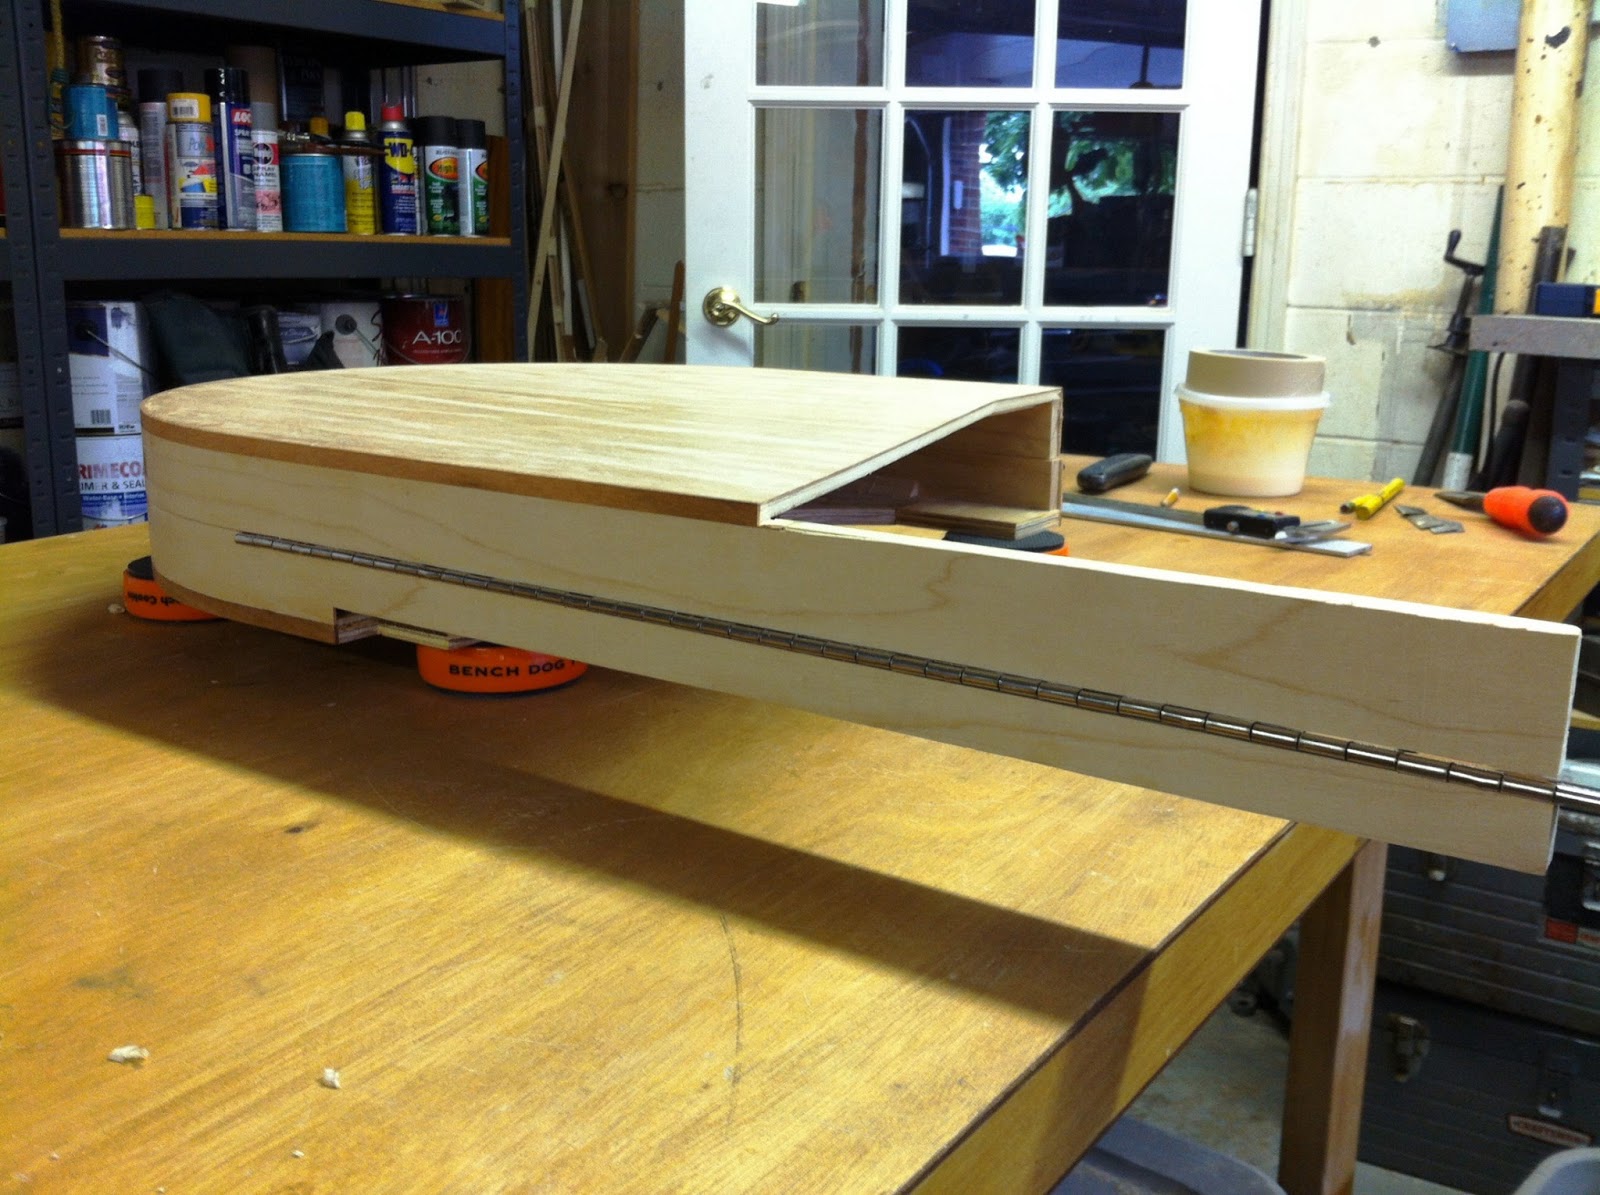
The upper blade guide beam needs a place to travel against the upper enclosure. The plans call for the entire section of enclosure to be cut out, but I chose otherwise. I set up two fences with a flush straight bit on the router to cut a 'dado' for the beam. This only took a few minutes.

 The top enclosure can now sit flush against the frame, while allowing the blade guide to move. I'll later need to work out how to mount the blade guide cover to the beam and allow it to move all the way up. I have a few ideas which should work.

 Underneath.

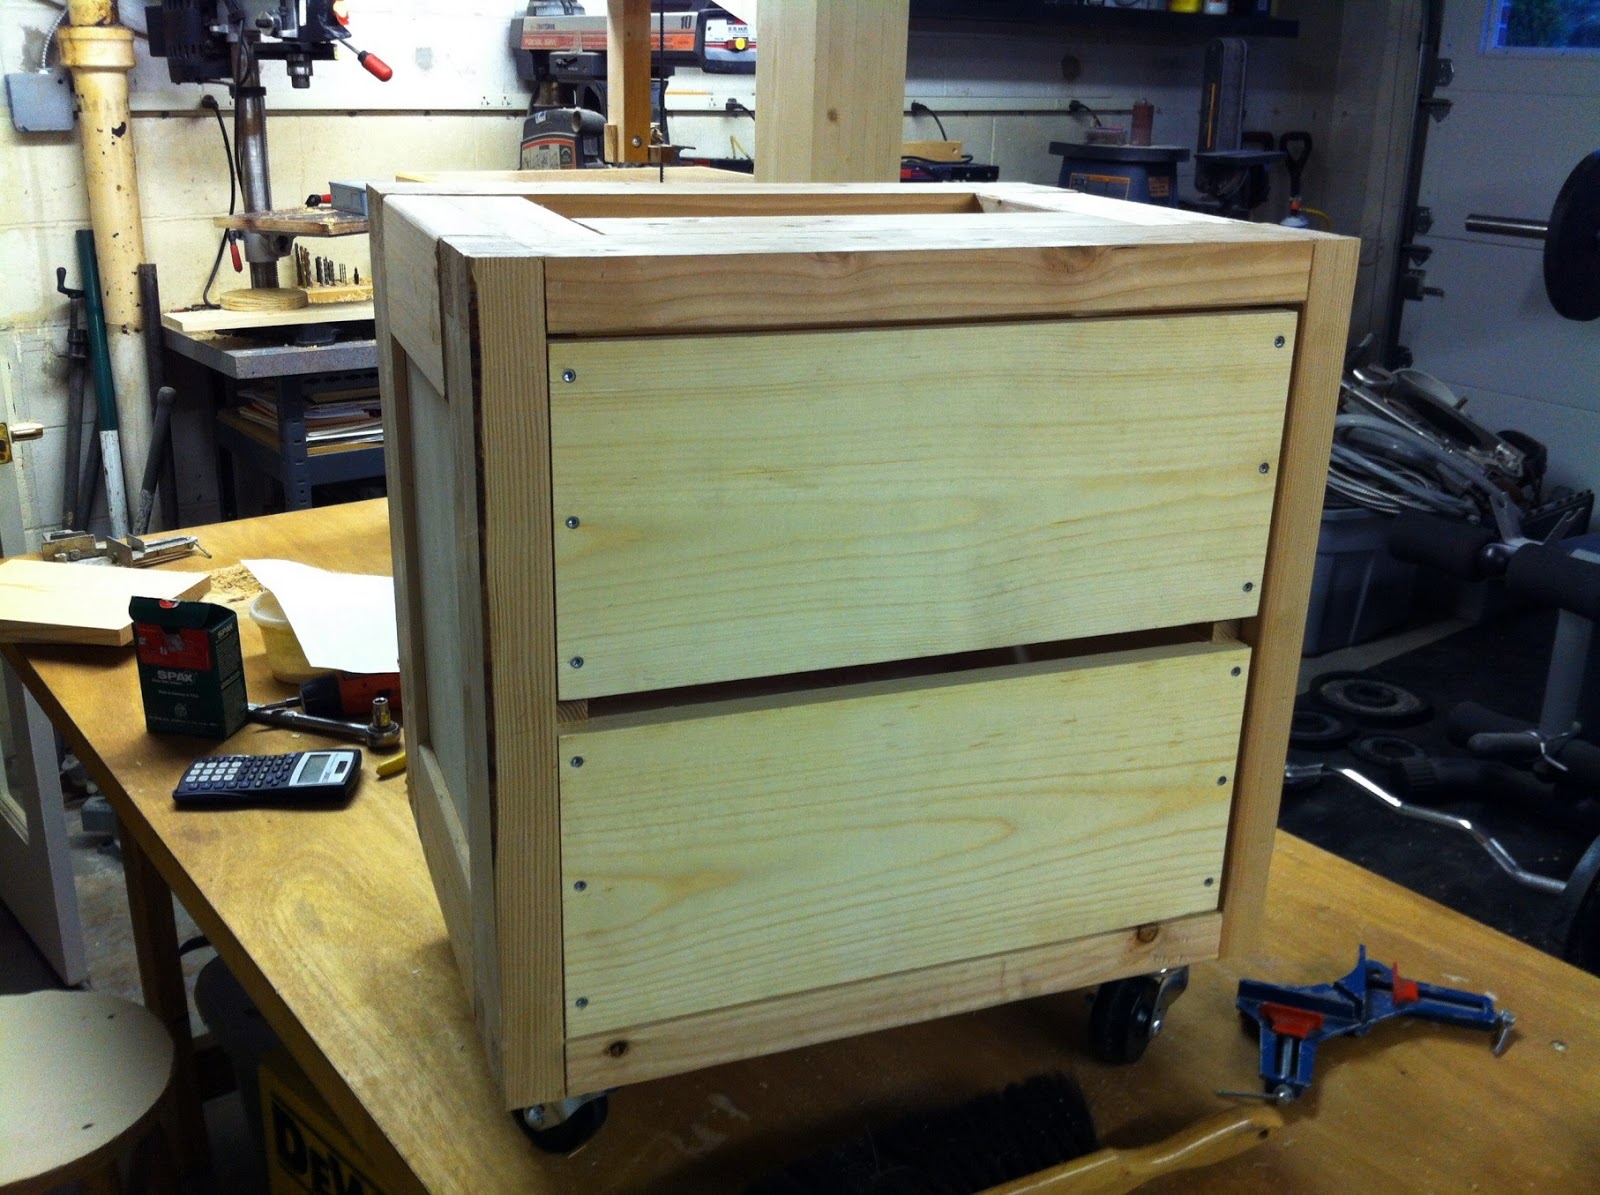
The lower enclosure will hinge like the top, and this is the left side bottom. This piece of wood has cutouts for the motor pulley and belt. Sorry for not showing the bigger picture.

The lower back enclosure is angled to direct dust. It is screwed in place to the frame.

The top of the bottom wheel is covered with this angled piece. Two screws mount it to the frame.

The lower enclosure cutout shown earlier will have a hinge installed. The location down the center will intersect with the cutouts for the motor pulley, so the hinge will be split. I've already done this, but forgot to include a picture.

The lower enclosure door gets joined from two scrap pieces of 1/4" plywood. This was repeated for the maple veneer.

4 strips of poplar provide support for the door. The poplar, plywood, and veneer were pressed in the vacuum press. I left it pressed for >24 hours in hopes warping would be minimized. So far, it has worked.

The section of upper enclosure needed extra rigidity from where the blade guide channel was routed. A bit of maple veneer essentially doubled the thickness behind that channel. At the top of the picture you can see the front of the upper enclosure. Pittsburgh has cycled through a mid/high 80's week followed by storms and a weekend of mid 50's. The change in humidity and temp warped the front enclosure so much, a straightedge against the front showed a 1/4" inward bow. This is unacceptable. I chiseled off the wimpy pine supports and replaced them with ~1/2" oak. After clamping them to the enclosure for >24 hours, the frame is nice and flat. Much better.

Progress is incredibly slow. I'm way off from the plans, so most of the enclosure is being built as I go along. This involves staring at the saw for 2 hours, holding a piece of pine against it for 2 minutes, then back to staring. Eventually some actual cutting and gluing fits in there.

Monday, May 20, 2013

Bandsaw: Update 10

I've spent quite a lot of time on the top wheel enclosure. The bulk of it is done. I won't really have to deal with curves anymore after this, so building the rest of the enclosure should be easy.

Gluing the side veneers became quite a problem and I spent a few days just trying to figure out how I'd do it. After a few dry-runs, I managed to find success. I first cut and pre-bent lengths of veneer. I split the side up into 2 parts.

Glue was applied and the piece was clamped to the enclosure. I used bits of wood and an extra thinner piece of veneer to spread the clamping pressure. This first part I used twine to help pull the edges down. It didn't work very well.

Finding a way to clamp it was difficult enough. I cut a round piece of scrap lumber with a round inside to act as a caul against the inside of the frame.

The edges done, I planed them down flush. There are some gaps between the outer edge and the front veneers, so...

...some tigerwood binding should cover that up. This is the same stuff from the other parts of the build (leftover hardwood flooring). I figure I'd keep the maple/tigerwood theme going.

I didn't have the proper router bearings to cut the deeper-than-1/16" binding channel, so I set up a router fence with a straight cut bit to cut the channel. The piece is entirely flat/square, so the cuts were easy. I did have a problem with the veneer chipping out.

Before gluing the binding, I chose to cover up the veneer joint on the side. More tigerwood.

The slot for this piece was cut with the bandsaw and a chisel.

I bent these binding pieces and the maple veneer sides from earlier with a heatgun. This helped out quite a bit. This is just standard masking tape.

I could use clamps around the back edges, so this was a little easier.

It's the same process for guitar building. I scraped the binding down with a burnished utility blade.

With it looking nice and pretty, I am now ready to saw the damn thing in half. This had to be perfect. I really didn't want to ruin all that hard work by butchering an otherwise decent piece of woodworking. I clamped a piece of 3/4" pine to the table saw and raised the blade to produce a zero clearance surface. Another piece was screwed to the fence. I set it to the appropriate distance...

...and fed it through. I kept even pressure against the fence and essentially 'rolled' the curve along the blade. It went perfectly. I couldn't have done it better.

A close up of the top tigerwood piece and the veneer against the poplar. Smashing.

I screwed the back piece  to the frame to see how it would look. It looks like wood.

I cut 5mm off from the back piece along this edge to fit the piano hinge. I used a table saw for this.

The hinge was screwed in place, and I now have a fancy door. Those cuts in the outside door braces were to alleviate springback from the plywood.

The slight springback does bring the two pieces slightly out of align, but I do plan to add little 'shims' on where the door closes to align everything. I will eventually put draw latches (3) on the top to clamp everything closed.

This will look great.

I figured I'd make this bandsaw look nice in the end. I imagine it will last me for quite a long time, so I may as well give it my all. 

The bottom enclosure will start soon. 
-APB

Sunday, May 12, 2013

Bandsaw: Update 9

A new motor, stand mounting, and enclosure work.

A quick test with the old v-belt and the new motor.  The new motor is a 1-1/2" HP, 1725 RPM, 115VAC, capacitor start/run motor. It's much bigger than I expected and I needed to extend the motor mount platform on the frame.

A smaller v-belt later... The motor came (from ebay) with an adjustable v-belt pulley/sheave. This will come in handy if I want to up the RPM for resawing or something.

I used four 3-1/2" screws to mount the saw to the stand. The table is at a perfect height.

I finally began building the enclosure. This is the top wheel cover back piece. I've deviated from the plans and designed a rounded top wheel cover.

I got some pallets and ripped and planed a few pieces of poplar. Left: After; Right: Before. The pallets I got also have some maple and oak pieces in decent condition.

The top curve is constructed from a segmented arc. Each piece has a 10 degree miter on each end. If continued, the arc would form an 18-sided polygon (octadecagon). 

 Some "kerfing" braces were glued inside to provide reinforcement to the arc.

The oscillating spindle sander was used to round the corners of the segmented arc.

From the side.

 These 4 maple mounting blocks are screwed into the enclosure and then onto the frame.

Only about half the screws to the mounting blocks are installed here. I'll be taking them on and off numerous times before completion, so there's no need to keep them all in.

Some longer pieces were glued along the sides.

1/4" plywood is cut for the front enclosure. You can see the back part is now veneered with leftover 1/16" maple veneer. I plan to do this for each part of the enclosure.

The 1/4" plywood front enclosure will need the same 1/16" maple veneer. Here is my plate joining jig in action joining the 1/16" veneer. This is about the lower limit on thickness I can get away with on this jig.

THIS LOOKS FAMILIAR. 

 Unfortunately, I did not foresee the amount of bowing I would get from gluing veneer onto one side of the 1/4" plywood. It was enough that the whole thing rocked back and forth when set on a flat surface. This complicated things a lot. I pre-bent some pine strips with heat to oppose the bend of the enclosure. I glued two in place. This corrected most of the bowing. With some heat (from a heat gun) and weights, I managed to get the panel fairly level. I actually over-bent it to the opposite direction. I added yet another brace along the angled part at the bottom of the panel.

 With the bowing leveled, I used my newfound arsenal of clamps to attach the panel to the rest of the enclosure.

The joint of the maple veneer is almost seamless. The joint is directly down the center of the front panel here. It's rotary-cut veneer so there's little chance of bookmatching here.

I plan on using a piano hinge for the top enclosure. The steps taken after this will be made on the fly, so details for the process are hazy at this point. The entire top segment here will eventually be split down the side using a table saw. More later. Enjoy.
-APB

Friday, May 3, 2013

Bandsaw: Update 8

I built the stand using the plans mentioned earlier. It's all based almost exactly off of them so there isn't anything special with this. So here's almost 20 pictures over about a week.

The dovetail joints were to be done in the 2x4s. They're pretty big joints. I did a test joint shown here on the bandsaw. I planed the final lengths of 2x4 to a consistent thickness and made all my cuts.

The angle of the dovetail depends on the type of wood used. A 1:6 angle (9.46 degrees) will work for softwoods like this pine. 1:8 for hardwoods. I made an angle jig with a fence to clamp to the bandsaw table, as written in the scriptures. I set it up so I only needed to clamp it in two positions - tilting left and tilting right. Two long horizontal stops are shown clamped equidistant from the blade. A depth stop is clamped behind the blade. The system works by placing a spacer against the angle jig fence, making a cut, remove the spacers, and make a second cut...

...to get this. I then flip the jig to angle to the left...

...to get this.

To help with hogging out the material, I made vertical cuts.

Hogged out. These are the 'pins' of the dovetail joints. The 'tails' were made by tracing the pin edges onto another 2x4 end, then cutting out. These are much easier to cut, and only requires a steady hand.

They fit quite well. I've glued them up here. The extra wood on the tails and pins were shaved off with a block plane and sander.

The two dovetail-joined frames were connected to each other via these 'L' pieces. Two pieces were just glued together to form the shape.


To make this.

The 'L's were connected to the frame via 1/2" dowels. You can see a 1/4" straight route along the inside edge of two sides. This will hold a 1/4" panel.

This is right before the gluing marathon. Some long clamps held forced everything together.

BAM.

and...uh....BAM. WHAMMO. w/ castors.

The drawers were fashioned from 3/4" (19mm) 1x8 boards. They were a cm or so shorter than the plans, so I made the whole stand that much shorter and increased the castor wheel diameter to compensate. Here I cut the boards to length, routed a 1/4" channel, and cut the rabbets for the joints.

Bottom panel fits nicely. some miter clamps helped to hold everything for gluing.

Kaboom. You can see I reenforced the rabbet joint with screws. Stew Mac catalog included.

Drawer 2, with drawer slides installed. The slides were made with some scrap ash, and screwed to the inside of the stand.

Back panel screwed in place. 1/4" plywood.

A better view of the slides.

Even more gooder.

I started applying a finish today, and it looks quite nice. The dovetails look quite professional. The box is incredibly sturdy and functions well. 

I finally bought a motor (1-1/2 HP, 1725 RPM, 115V [a bit overkill]) so now I can install that and start on the saw enclosure, which I will redesign to something different than the plans. I plan to use some leftover 1/16" maple veneer for the final finish and shape. I also plan to use a piano hinge setup for the enclosure instead of dowels described on the woodgears website.

All for now. Buy.