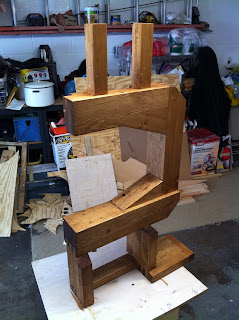
The last little piece to build was this extra cover for the front of the motor. It's just the usual plywood laminated with veneer. A maple wedge holds it to the frame.
My shipment of knobs and draw latches arrived from McMaster Carr faster than I received the invoice. I've bought the shafts, shaft collars, and bearings from them.
The draw latches are spring tensioned latches. I chose these over others because they were the only few that would lie roughly center over the enclosure 'seam'. The knobs were used for the under-table cover, table trunions, blade tracking, blade guide column, and blade guide depth (not shown).
Another angle. Now I need to dismantle it all. Hooray.
I haven't gotten a shot of inside the lower wheel enclosure, so here it is. I had removed the table and trunion mounts at this point.
NUDE. I used a small block plane to bevel and round the edges.
Brought it outside for an all day sanding marathon. I used a random orbital sander, 100 grit at first.
yep.
I then hand sanded everything to 180 grit, paying close attention to the areas that will be visible.
Then stained it. It took a long time to pick a good stain. I didn't know what color to choose that would compliment the red-ish tigerwood and light maple. I could have left it naked and just clearcoated it, but I don't think I would have liked that. I went with "Early American" Minwax stain. I had some darker ones, but they would have been too dark.
Here's all the parts minus the frame, stand, blade, and belt. I need to sand everything for finishing with Minwax Polycrylic semi-gloss.
I made sure to remove any glue spots from the major pieces.
I believe this was coat 3 from the enclosure parts. The frame had to wait a day before applying a finish.
The frame clearcoated. It's hard to tell the difference with this picture.
Once all the pieces got 3 coats and 48 hours cure, I began to reassemble. I needed to improve the motor mount, so I drilled some counterbores for the mounting bolts' nuts to fit. I won't have access to the underside of the hex bolt to tighten these once the frame is attached to the stand, so with this I can secure the bolts to the frame once and not have to adjust them. The scrap piece shown above helped center my forstner bit.
The first few pieces are installed.
The motor installed, initial spin-up. Splendid.
Bottom enclosure done. The upper wheel mount assembly was installed and lubricated with some bar soap. The applied finish against itself has a high coefficient of friction and tends to lock any moving parts in place. The soap helped well, and made the saw smell nice.
Boom. Done. I still need to trim that drawer to fit.
The color scheme turned out quite well. The tigerwood is a little too close to the frame color, but overall it's better than I expected.
NICE
WOW ANDREW, NICE JOB.
YOU DID IT.
The table has its finish applied and is curing.
I'll perhaps have a small update later.
Thanks.


