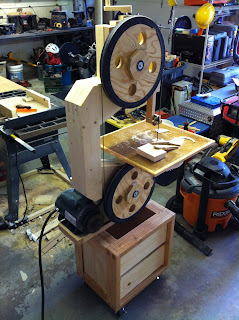
A quick test with the old v-belt and the new motor. The new motor is a 1-1/2" HP, 1725 RPM, 115VAC, capacitor start/run motor. It's much bigger than I expected and I needed to extend the motor mount platform on the frame.
A smaller v-belt later... The motor came (from ebay) with an adjustable v-belt pulley/sheave. This will come in handy if I want to up the RPM for resawing or something.
I used four 3-1/2" screws to mount the saw to the stand. The table is at a perfect height.
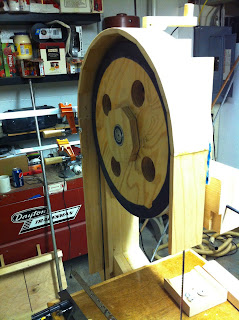
I finally began building the enclosure. This is the top wheel cover back piece. I've deviated from the plans and designed a rounded top wheel cover.
I got some pallets and ripped and planed a few pieces of poplar. Left: After; Right: Before. The pallets I got also have some maple and oak pieces in decent condition.
The top curve is constructed from a segmented arc. Each piece has a 10 degree miter on each end. If continued, the arc would form an 18-sided polygon (octadecagon).
Some "kerfing" braces were glued inside to provide reinforcement to the arc.
The oscillating spindle sander was used to round the corners of the segmented arc.
From the side.
These 4 maple mounting blocks are screwed into the enclosure and then onto the frame.
Only about half the screws to the mounting blocks are installed here. I'll be taking them on and off numerous times before completion, so there's no need to keep them all in.
Some longer pieces were glued along the sides.
1/4" plywood is cut for the front enclosure. You can see the back part is now veneered with leftover 1/16" maple veneer. I plan to do this for each part of the enclosure.
The 1/4" plywood front enclosure will need the same 1/16" maple veneer. Here is my plate joining jig in action joining the 1/16" veneer. This is about the lower limit on thickness I can get away with on this jig.
THIS LOOKS FAMILIAR.
Unfortunately, I did not foresee the amount of bowing I would get from gluing veneer onto one side of the 1/4" plywood. It was enough that the whole thing rocked back and forth when set on a flat surface. This complicated things a lot. I pre-bent some pine strips with heat to oppose the bend of the enclosure. I glued two in place. This corrected most of the bowing. With some heat (from a heat gun) and weights, I managed to get the panel fairly level. I actually over-bent it to the opposite direction. I added yet another brace along the angled part at the bottom of the panel.
With the bowing leveled, I used my newfound arsenal of clamps to attach the panel to the rest of the enclosure.
The joint of the maple veneer is almost seamless. The joint is directly down the center of the front panel here. It's rotary-cut veneer so there's little chance of bookmatching here.
I plan on using a piano hinge for the top enclosure. The steps taken after this will be made on the fly, so details for the process are hazy at this point. The entire top segment here will eventually be split down the side using a table saw. More later. Enjoy.
-APB


No comments:
Post a Comment