Saturday, June 22, 2013

Bandsaw: Update 14

The bandsaw is nearing completion. The little things about the build are slowing things down a bit, such as finding hardware and cosmetic details.


This is a pretty good angle of the nearly complete bandsaw. The motor pulley cover has had its binding installed and was attached to the lower enclosure. You'll notice in most recent shots of the saw that the top drawer is never closed completely. That's because I made it with too little clearance and the drawer won't close at all since the stand frame has shifted over the past few months. It's an easy fix.

The under-table cover is finished. I have some screw inserts that will allow this piece to be tightened to the frame. I will install these soon.

I still need to find suitable draw latches for the enclosure, which is turning out to be quite difficult. Most latches are either too big, or too off center. I'll figure something out eventually. I'll need to get a few knobs for the various 'tightenable' pieces such as the table trunions, blade guide column, blade guide, and blade tracking. I'll have to order something from the interwebs soon. Other than that, I'm able now to dismantle everything, sand, route (round-over the frame), and finish. Afterwards I'll button everything up and tune a few things such as table leveling and upper wheel shaft wobble that I've noticed. More later.
 

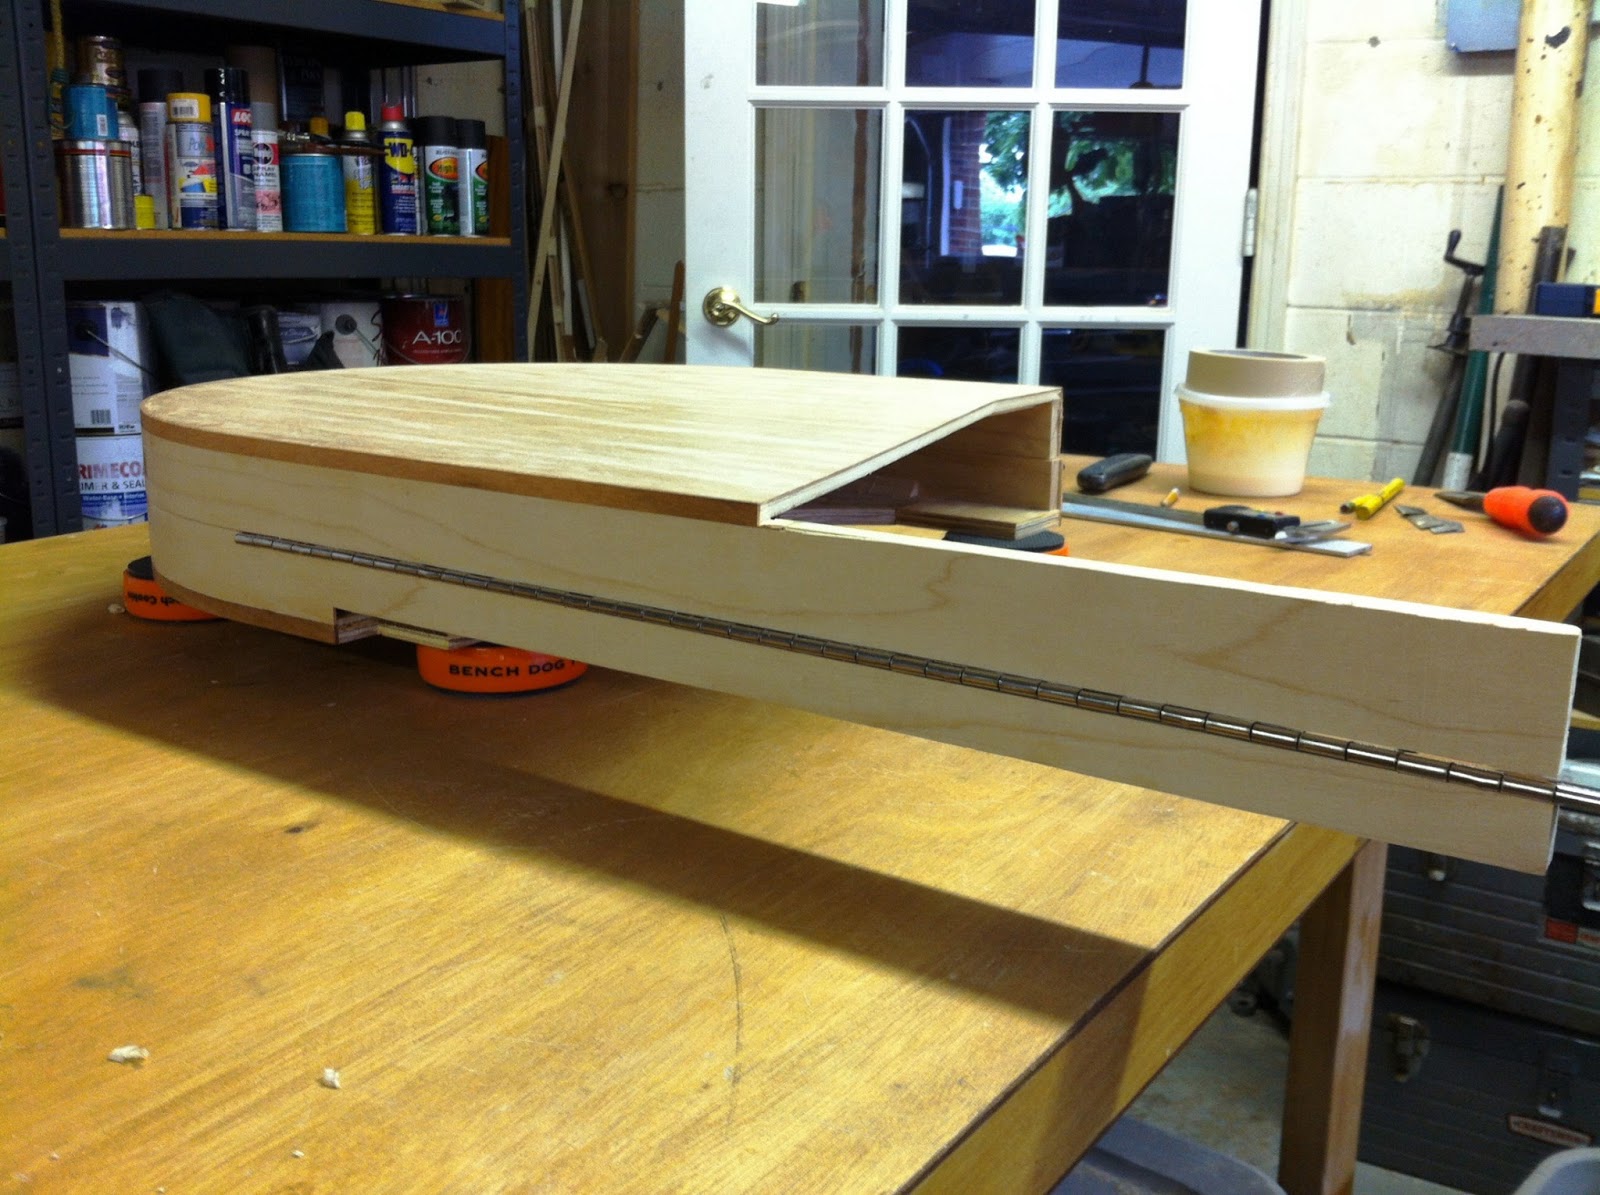
My mother asked if I could make a table from a wooden wagon wheel she had. I designed something quickly in AutoCAD and started cutting some wood.

I got a good deal of 'smoke damaged' ash boards a few weeks ago. The boards are 3/4" thick and don't have any 'flutes' underneath. There are only the tongue and groove to deal with. I cut some to length here for the main support.

I cut them to width by mitering the edges to 22.5 degrees.

The pieces laid out, with a dado for the top support. In hindsight, I should have added another center octagon to improve the structure. No problems now, but I imagine the miters won't hold perfectly on their own over the years.

I then formed an octagonal pillar. This was quite interesting to glue together. I'm using Titebond III leftover from the ES335 build. Since this table will be outdoors, waterproof glue would be preferred.

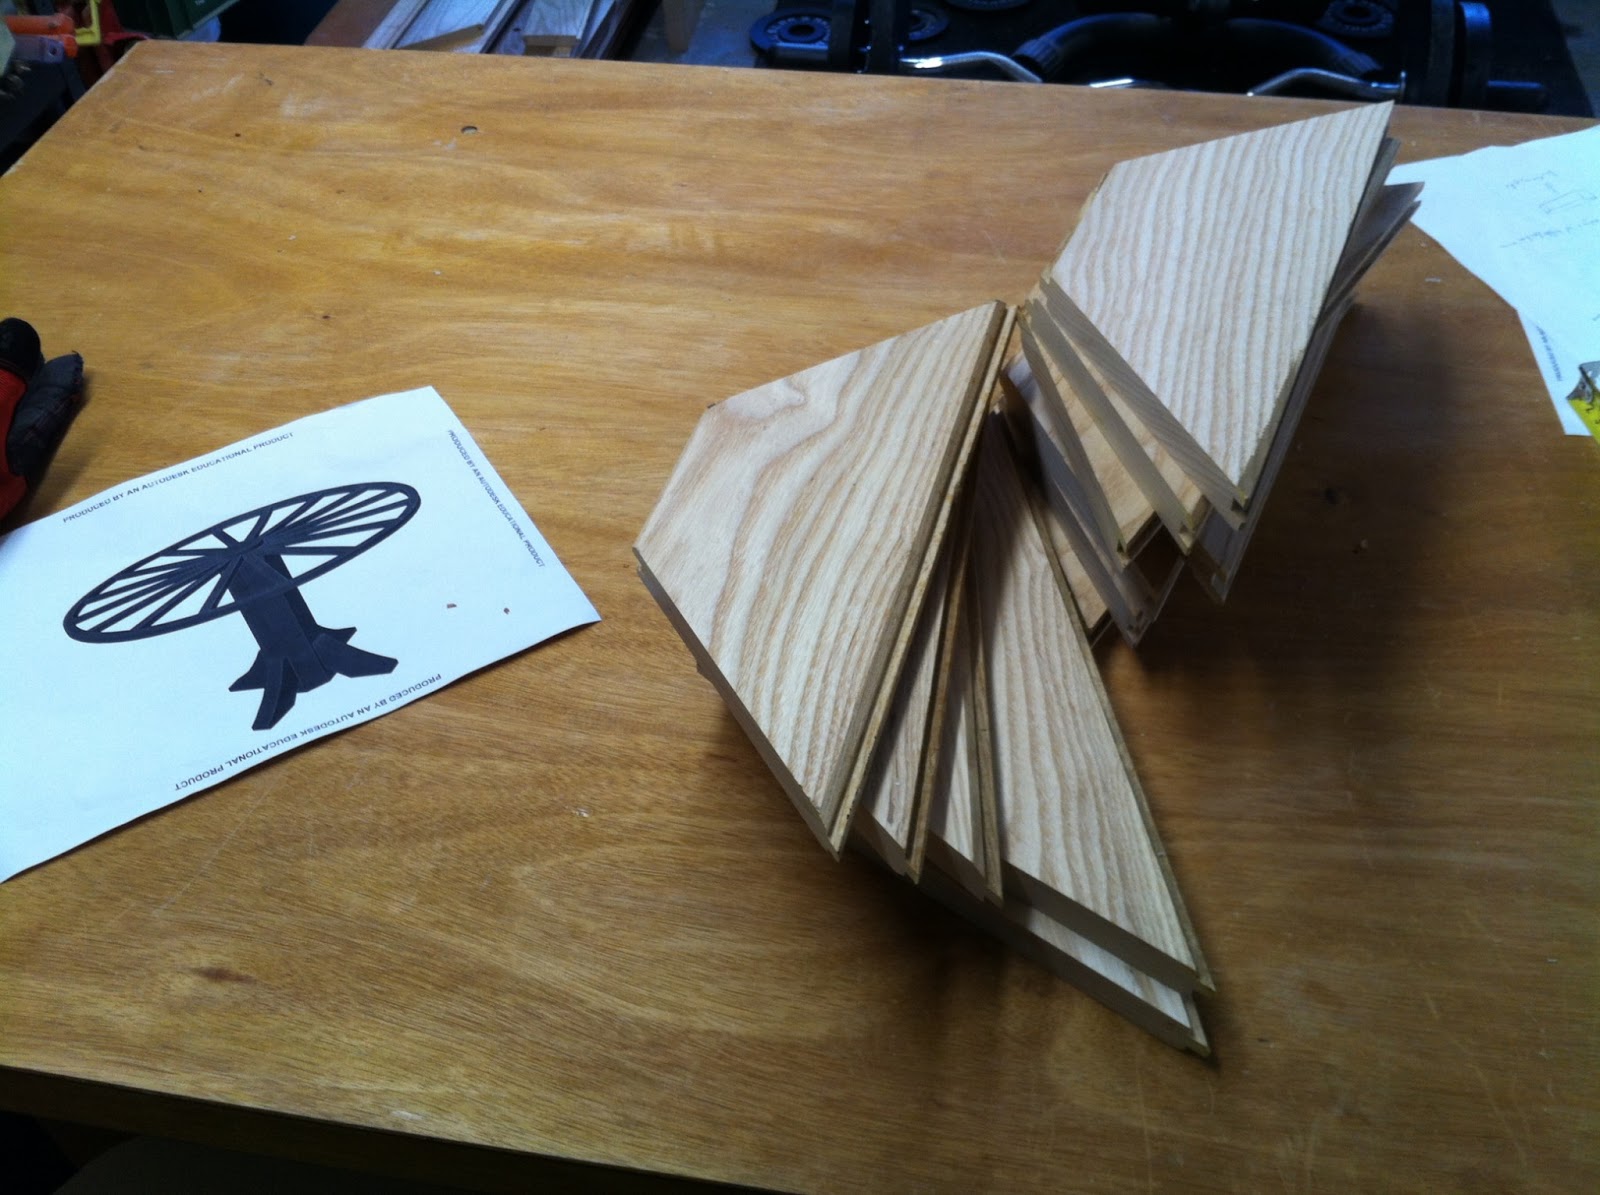
Here's a view of the printout CAD model, and the 45 degree table legs. They will be 3 layers of 3/4" thick (1-1/4"), so I have 12 pieces cut out here.

I trimmed the tongue and groove, and planed the surfaces to promote proper adhesion. They are then glued together.

I used my bandsaw to cut a pleasant little curve into the supports. I then cleaned it up with the spindle sander. 

A quick mock up. Looks alright.

I routed the edges with a round over bit to give it some looks. I then used the drill press, with the table at 45 degrees, to drill holes for the 3/8" hanger bolts. I filled the holes with wood glue and threaded the bolts into the wood. Two nuts were threaded onto the machine end so it can be torqued using a wrench.

I assured the pillar support thing was square to the table, and transferred the bolt locations to it.

I drilled the holes, added a washer and nut, and tightened the legs. Violin. 

Very little wobble. I will sand and finish soon. 

Check out the 'Browse' menu at the top right of the page to navigate my blog a little easier. I hesitated to spend time organizing this blog, since I'd rather spend time building an actual website, but this will do.

More later,
Andrew


Tuesday, June 11, 2013

Bandsaw: Update 13

 EHH...
Here I've prepped some scrap 1/4" plywood for the motor pulley cover.

I cut out part of a piece of 2x6 (?) with the proper curvature for the pulley clearance.

I then cut the piece from the 2x6 and place it on the plywood.

Along with a straight piece, I glued it to the plywood.

A quick pass on the table saw brought the curved piece to its proper thickness. I cut out clearance for the motor

I glued the other side onto the curved piece.

A cutout for the motor shaft was done later. I used the bandsaw and oscillating spindle sander to remove the excess. 

I glued some maple veneer to the cover using all of my bar clamps.

 I glued some bits of poplar around the blade to cover it.

 Here's a good shot of the channel that the blade travels up through. I afterwards trimmed any excess wood away and veneered the channel. No binding for this section.

I added some extra binding to the upper enclosure door. The pulley cover is just resting on the pulley. I have yet to figure out a way to mount it. This cover will eventually get binding.

Another shot. 

The bottom underneath the table has the lower blade guide and blade exposed. Covering it will help control dust. It will only be installed when the table is set to 0 degrees. Here, 1/4" plywood is being veneered on both sides with maple. I chose to laminated both sides to keep things symmetrical which will prevent warping.

 Some extra 3/4" plywood and smaller bits form a box that is contoured to cover all exposed areas.

Here it is held in place. It will get binding. I imagine a bolt into the frame will suffice to hold it in place.

More later.


Tuesday, June 4, 2013

Bandsaw: Update 12

 EH.
The bottom enclosure has all the faces ready for gluing.

A better view of the hinge side. The front face is leaning against the drawer at the bottom.

I needed to split the sides along the hinge plane. I marked my lines and prepared to cut. I left enough width on each piece to compensate for the table saw blade kerf.

Dry fit with the cut side pieces. You can see the top piece cut. I made sure everything was flush...

...and applied glue and clamped. The split sides were held in place with some masking tape. I made sure while clamping to keep those pieces aligned so the door would close in line. 

The doors open after drying. The bottom door can open a maximum of 90 degrees, as the hinged side piece makes contact with the motor sheave. 

To add support to the sides, I cut and glued triangular supports as done before on the top enclosure. I use these weights a lot to keep everything flat while gluing.

Look, more binding. Same process as before, this time easier since there aren't any curves.

With the bottom bound and hinged, I cleft a phone book in twain. I'll add some trim around the bottom there to cover the opening into the stand.

I'm going to order a few draw latches soon to attach to the doors. The next two parts of the enclosure are the motor sheave cover and table underside cover. Afterwards, I'll do some touching up here and there followed by dismantling the entire thing and applying a finish (Minwax Polycrylic). There are some smaller things like a blade cover on the blade guide, extra binding, wiring the motor, and tuning up the wheel mounts.

More eventually.

Tuesday, May 28, 2013

Bandsaw: Update 11

 Eh.
The upper blade guide beam needs a place to travel against the upper enclosure. The plans call for the entire section of enclosure to be cut out, but I chose otherwise. I set up two fences with a flush straight bit on the router to cut a 'dado' for the beam. This only took a few minutes.

 The top enclosure can now sit flush against the frame, while allowing the blade guide to move. I'll later need to work out how to mount the blade guide cover to the beam and allow it to move all the way up. I have a few ideas which should work.

 Underneath.

The lower enclosure will hinge like the top, and this is the left side bottom. This piece of wood has cutouts for the motor pulley and belt. Sorry for not showing the bigger picture.

The lower back enclosure is angled to direct dust. It is screwed in place to the frame.

The top of the bottom wheel is covered with this angled piece. Two screws mount it to the frame.

The lower enclosure cutout shown earlier will have a hinge installed. The location down the center will intersect with the cutouts for the motor pulley, so the hinge will be split. I've already done this, but forgot to include a picture.

The lower enclosure door gets joined from two scrap pieces of 1/4" plywood. This was repeated for the maple veneer.

4 strips of poplar provide support for the door. The poplar, plywood, and veneer were pressed in the vacuum press. I left it pressed for >24 hours in hopes warping would be minimized. So far, it has worked.

The section of upper enclosure needed extra rigidity from where the blade guide channel was routed. A bit of maple veneer essentially doubled the thickness behind that channel. At the top of the picture you can see the front of the upper enclosure. Pittsburgh has cycled through a mid/high 80's week followed by storms and a weekend of mid 50's. The change in humidity and temp warped the front enclosure so much, a straightedge against the front showed a 1/4" inward bow. This is unacceptable. I chiseled off the wimpy pine supports and replaced them with ~1/2" oak. After clamping them to the enclosure for >24 hours, the frame is nice and flat. Much better.

Progress is incredibly slow. I'm way off from the plans, so most of the enclosure is being built as I go along. This involves staring at the saw for 2 hours, holding a piece of pine against it for 2 minutes, then back to staring. Eventually some actual cutting and gluing fits in there.

Monday, May 20, 2013

Bandsaw: Update 10

I've spent quite a lot of time on the top wheel enclosure. The bulk of it is done. I won't really have to deal with curves anymore after this, so building the rest of the enclosure should be easy.

Gluing the side veneers became quite a problem and I spent a few days just trying to figure out how I'd do it. After a few dry-runs, I managed to find success. I first cut and pre-bent lengths of veneer. I split the side up into 2 parts.

Glue was applied and the piece was clamped to the enclosure. I used bits of wood and an extra thinner piece of veneer to spread the clamping pressure. This first part I used twine to help pull the edges down. It didn't work very well.

Finding a way to clamp it was difficult enough. I cut a round piece of scrap lumber with a round inside to act as a caul against the inside of the frame.

The edges done, I planed them down flush. There are some gaps between the outer edge and the front veneers, so...

...some tigerwood binding should cover that up. This is the same stuff from the other parts of the build (leftover hardwood flooring). I figure I'd keep the maple/tigerwood theme going.

I didn't have the proper router bearings to cut the deeper-than-1/16" binding channel, so I set up a router fence with a straight cut bit to cut the channel. The piece is entirely flat/square, so the cuts were easy. I did have a problem with the veneer chipping out.

Before gluing the binding, I chose to cover up the veneer joint on the side. More tigerwood.

The slot for this piece was cut with the bandsaw and a chisel.

I bent these binding pieces and the maple veneer sides from earlier with a heatgun. This helped out quite a bit. This is just standard masking tape.

I could use clamps around the back edges, so this was a little easier.

It's the same process for guitar building. I scraped the binding down with a burnished utility blade.

With it looking nice and pretty, I am now ready to saw the damn thing in half. This had to be perfect. I really didn't want to ruin all that hard work by butchering an otherwise decent piece of woodworking. I clamped a piece of 3/4" pine to the table saw and raised the blade to produce a zero clearance surface. Another piece was screwed to the fence. I set it to the appropriate distance...

...and fed it through. I kept even pressure against the fence and essentially 'rolled' the curve along the blade. It went perfectly. I couldn't have done it better.

A close up of the top tigerwood piece and the veneer against the poplar. Smashing.

I screwed the back piece  to the frame to see how it would look. It looks like wood.

I cut 5mm off from the back piece along this edge to fit the piano hinge. I used a table saw for this.

The hinge was screwed in place, and I now have a fancy door. Those cuts in the outside door braces were to alleviate springback from the plywood.

The slight springback does bring the two pieces slightly out of align, but I do plan to add little 'shims' on where the door closes to align everything. I will eventually put draw latches (3) on the top to clamp everything closed.

This will look great.

I figured I'd make this bandsaw look nice in the end. I imagine it will last me for quite a long time, so I may as well give it my all. 

The bottom enclosure will start soon. 
-APB