Friday, April 12, 2013

Bandsaw: Update 6

Many hours later.

I clamped the saw down to the table, along with the 1/3 HP motor on the side. 

At this point I was able to spin the saw up for the first time. The wheel pitch, wheel height, wheel shaft position, and blade guide positions had to be adjusted.  The tension of the blade held the bearings in place for testing.

Blade guide detail

Using the patented bearing-screwdriver technique, I balanced the wheels. I let the wheel settle with the heavy side down. I then taped a few pennies a fixed distance from the center. Once balanced, I calculated the equivalent volume of plywood to remove from the opposite side from the pennies. I drilled that volume out and the wheel was balanced. This method worked perfect the first time. 

I determined the final wheel position and cut out some wooden washers and some thin cardboard to achieve the proper spacing. The same was done for the bottom.

A temporary MDF table was clamped to the trunnion beam.

I haven't used a bandsaw in years, so this was quite enjoyable. These are the trunnion cradles.

 It is important for proper table function that the trunnions are shaped perfectly. I determined the following method for achieving perfect trunnions. This is tigerwood.

 I first cut these rough shaped 'semi'-circles. The center points for the circles are included in the cuts.

A nail allows me to spin the pieces around and true the semi-circle edge.
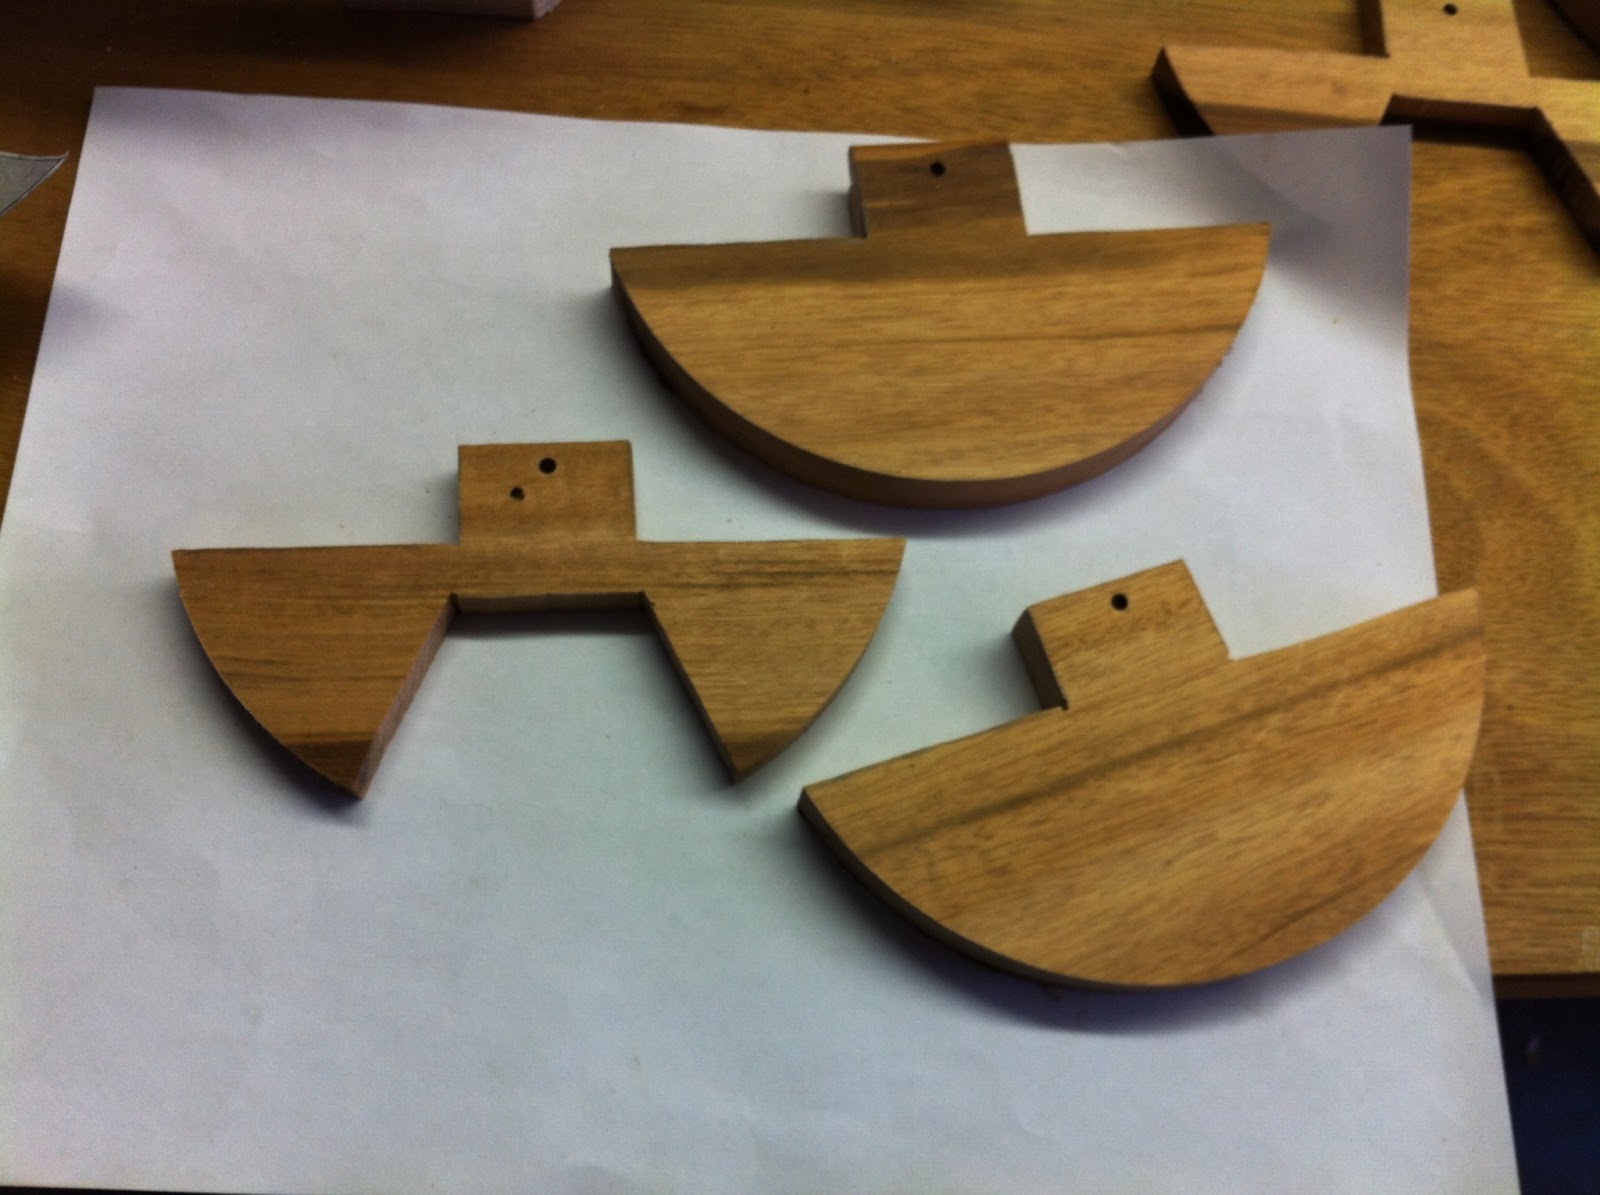
With all 6 pieces trued, I cut a notch for the center of the trunnions.

The nail helped me align the pieces for gluing and clamping.

Chopped off the center point 'nib' with the bandsaw.

Then cut out the inner curve and sanded it smooth.

After a few hours, I trued my trunnions. This involved pencil graphite to mark high points on the maple cradles. These high points were sanded down, and the process repeats until I was satisfied.

The sub-table was cut from 3/4" birch plywood. Nothing special. The trunnions were screwed onto the sides.

I align the center of the trunnions with the blade. I marked the bottom of the sub-table. This will help with placing the trunnion cradles onto the trunnion support beam.

 The 'shop'.

After careful measuring and marking, I drilled the holes for the dowels on the trunnions support beam and cradles. 

The dowels swell and essentially clamp the cradles in place. This is my first experience with dowel joints.

The trunnions fit perfectly on both sides. I couldn't have done it better. Everything's aligned and the trunnion center line is right where it should be. This picture also shows the lower wheel's stop on the shaft, consisting of a bolt and washer. The same was done on the upper wheel.

I marked on the trunnion cradles where the clamping bolt will go. This is determined by tilting the sub-table 45 degrees, and marking where the trunnions' inner slot stops. This basically means that the table will stop when it hits the bolt at 45 degrees. 

The hole is drilled. The 1/4" carriage bolt sits in a small piece of maple inside the trunnion curve. The system works perfectly. 

I have cut out the main table (in a very dangerous fashion) out of 2'x4' birch plywood. I have stained it a dark color, and will apply an epoxy finish using the same epoxy I used for my guitar. A maple trim will also be glued to the outside of the table. 

All left is the main table, the motor, and the outer casing.

Friday, April 5, 2013

Bandsaw: Update 5

 Hi.
I finally found some 14" tubes. I cut them down the middle and stretched them over the wheels.

Some rip cuts and a 35 degree cut later, I have the main extension for the upper blade guide. The smaller bits for the actual blade guide components were quick to cut, so I didn't document that at all.

This block will be the clamp for the upper blade guide extension. It has a series of steps and angles that need cut, so this piece was a bit difficult to manufacture. I used a large forstner bit to remove most the center...

... then I used the cross-cut sled to flatten the main area out. You can see the marks of future cuts in the picture. These were all done with the table saw. The blade has dulled noticeably since working this maple.

 Shown are the new blade guides, including the guide blocks made from leftover mahogany for the guitar neck. Care was taken to ensure the long upper blade guide extension moved linearly along the blade. The notch, which was cut in the frame, was squared carefully with a circular saw followed by a chisel.

The extension clamp is in place. The guides hold firmly. I'll need to either manufacture a few hand knobs, or buy some plastic ones. These would be used for the upper blade guide extension and thrust bearing (along with the future table trunions).

That's all for now. I'll try to document more in the future.

Friday, March 29, 2013

Bandsaw: Update 4

More work done, etc, etc, etc....

The wheels need their diameters and crowns. I used the smaller bandsaw motor and hammered a circular piece of plywood to it. I used a cheap set of lathing chisels to make a groove in it to fit the v-belt.

 A sandwich of three circles of plywood make a temporary large pulley seen here. The shaft is clamped to blocks of wood onto the bench.

After a good deal of sharpening, the lathe chisels from Harbor Freight actually cut and I got the wheels to the proper diameter and crowned.

Before and after. I trued out any wobble with the sides of the wheels.

Skipping forward to the bottom wheel, I mounted a ~3/4" piece of plywood to the opposite side of the temporary pulley and cut a groove for the v-belt. I removed the temporary pulley and spun up the wheel as shown. This is the final wheel-pulley assembly.

 I need a dust collector.

Showing the crown, v-belt groove, and spot filling. I eventually coated the wheels with finish.

Just a view of the upper wheel mount assembly. Mostly maple besides the plywood and frame. The hardwoods have been coated with finish.

Different lighting. Looks good.

 Now for the trunion support beam. I needed a thick piece of hardwood (~2.25") for it, so I laminated a 1.5" maple piece with some scrap tiger-wood flooring.

 I trimmed the sides, made a few cuts, and drilled some holes. Looks much better.

In place, along with the lower blade guide mount from maple. Didn't document that much.

Set a blade on the bare wheels. Everything's parallel and smooth. Nice. I would put the tires on, but I couldn't find any store that sells 14" tires nearby. I spent hours and 5 different stores and couldn't find one. 

Pilot holes drilled, and the beam is mounted.

I'll finish the blade guides, and try and get a motor. Still no luck there.

-Pancake

Friday, March 22, 2013

Bandsaw: Update 3

With my job, I only have a few hours each day to work on the saw. Here's what I've gotten done.

I drilled counter-bores and holes for some 5" screws to mount the lower wheel mount. After this, I finished gluing the base pieces into the joints shown. 

I bought a 4'x8' sheet of ~3/8" and a 2'x4' sheet of  ~1/2" plywood for the wheels. With the 1/2" in the middle, a 3 layer sandwich is made. I cut them out with a sabresaw.

Layers being clamped against a barbell underneath. The barbell helps keep it flat. I had an issue with the one side of the barbell being slightly curved, which did curve the final laminate. I hand planed it back down afterwards without an issue.

I used an adjustable circle cutter to cut a hole for the bearings. They have to be incredibly snug. A vice was used to press them in. Shown also here is the upper wheel mount assembly, showing the pitch adjuster bolt and T-nut.

A backing piece of plywood is glued onto the previously shown flanges.

And then glued onto the wheel using some new clamps and a few holes drilled into the wheel.

 The second bearing for each wheel is glued while on the shaft, so I can rotate the wheel to check alignment before final clamping.


One down.

And two.

I'll need a temporary setup for truing the wheels so I pulled this 1/3hp motor from a cheap Craftsman 9" bandsaw (which has perhaps a 3" re-saw capability). A pulley will be affixed to the motor while a larger temporary pulley will be mounted to the wheel clamped to the table. Further updates should clarify this procedure.

Everything's going smoothly.

Over and out.
-Andrew

Saturday, March 16, 2013

Bandsaw: Update 2


I've put a bit more work into the bandsaw. Here's some pics yo.


 With the final frame pieces glued to the upper 'C' section, I hacked off the corners for an aesthetic touch. The circular saw was in an inconvenient location (right out the garage door and in the truck) so I opted for ye' olde fashioned method. The saw was very dull and I regret everything.

Some more parts for the supports glued.


I bought a 1.75" square dowel from Le Home Depoux, planed it to thickness, and made a few crosscuts for the upper wheel mount frame. It looks like maple.


Making great use of my crosscut sled, I sliced up some rabbets. The frame gets glued.


Trimmed and planed slightly.


This is a load bearing part of the saw, carrying the tension of the blade. It needs to be strengthened with splines. It's my spline jig's time to shine. The shims for the splines are in the background. 


Trimmed, etc. 


Here's a used maple bench from a school. I should be able to make all of the hardwood portions with this.


 Shown also in the previous photo, these to thicknessed pieces will make the bottom wheel mount.


 I bought two 1" shafts, 4 bearings, and 4 shaft collars for the saw. Here's one in the lower wheel mount. Look at me, I'm captain america.


Here's a rip cut for the upper wheel mount. It needs to be ~3.5" thick, so I need to cut and join a few. I'm quite surprised at the quality of the maple underneath. Makes me ashamed it's only being used for a structural application. 


 Jumping ahead quite a bit. I joined the upper wheel mount pieces and cut them to shape in a series of complicated and dangerous table saw cuts. A 1" hole was added. I ripped more maple for the frame mounts and drilled 10 holes for mounting. The actual splined frame got trimmed to fit into the frame mounts. It's a tight fit and should work great.


I'll finish up the upper wheel mount mechanism soon, along with mounting the lower mount. Once the lower is mounted, I can glue the remaining base support and motor mounting frame pieces. I'll purchase some plywood soon for the wheels and get them glued while simultaneously shopping for an electric motor.

-Bye.